Scones

scone

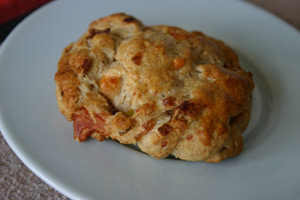
I love a hot baked something for breakfast on Sunday mornings. At our house, that usually means scones. This recipe is based on one given as a wedding shower gift by my friend C., a talented baker. A cousin of the humble biscuit, scones are a traditional Scottish quickbread that rely on baking powder for leavening. The buttermilk lends a tender component, which I prefer to the denseness found in scones made with cream.

Usually, I go the sweet route and make them with currants, dried apricots and pecans, or dried cherries and bits of dark chocolate. But lately I’ve been going savory, specifically bacon+onion+cheese. Absolutely delicious, although this eliminates the excuse to eat jam, Devonshire cream, or lemon curd with breakfast.

Buttermilk Scones

2 c. all-purpose flour
1 c. whole-wheat flour
1/3 c. sugar (omit if making savory scones)
1 T. baking powder
1/2 t. baking soda
1 t. salt
6 oz. unsalted butter, cold and cut into chunks
1 c. buttermilk
up to 1 c. of additions (dried fruit, nuts, chocolate, grated cheese, sauteed onion, crumbled bacon, chopped ham)
1 T. minced herbs (for savory scones)
1 egg, beaten for egg wash
Preheat oven to 400F.

Mix dry ingredients in a bowl. Use a pastry cutter to mix in the butter. The dough should have the texture of coarse crumbs. Gently blend in the buttermilk, mixing until just combined. Gently fold in the additional ingredients.

On a floured surface, gently roll or pat the dough to 1 1/4 inch thick. Cut with a biscuit cutter, re-roll scraps until all dough is used. Place on ungreased cookie sheet (preferably lined with parchment). Brush tops of scones with egg wash. Bake for around 20 minutes, until scones are browned on top and on the bottom. Serve immediately!

You can freeze the unbaked scones and then just bake them off a few at a time. Freeze them on a cookie sheet, then store in a ziplock bag for up to a month. No need to thaw, just pop them in a preheated oven.

Ramps!

ramps2

On Sunday morning I made a mad dash through Whole Foods, gathering last-minute ingredients for our Mother’s Day luncheon. Just as I’d squeezed past the bottleneck at the floral department (dads and kids), I skidded to a stop at the sight of a huge pile of ramps. Ramps! Have not seen them in the grocery store, ever.

Ramps are wild leeks, harvested in early spring. Or at least in May here in Chicago (so named for the stink of marshes filled with ramps). The white bulb, pinkish stalk, and lush greens are edible and have a soft garlic/assertive onion flavor and aroma.

Excited by my discovery, I bought a lot of them. Dinner the next night was a delicious and simple roast of chicken, ramps, and baby potatoes. The recipe I used is from Epicurious, which, for a change, I followed to the letter.

Burger Heaven…or Hell?

kumas

Last fall, the Husband and I discovered Kuma’s, a bar that serves outrageous burgers on the Northwest side. If the original Exit had a kitchen (and a dedicated cleaning crew), this is what it would feel like. True, it’s insanely crowded. Unless you snag a seat at the bar, the wait is excruciating. But once your food arrives, your reward is swift, juicy, and piled high with things you didn’t think could or should top a burger.

Selection is part of the good fun, as most combinations are named for heavy metal bands (the Slayer: “Pile of fries topped with a ½ lb. Burger, Chili, Cherry Peppers, Andouille, Onions, Jack Cheese, and Anger”) or for how you’ll feel afterward (the Clutch: “Cheddar, Swiss, Jack, Smoked Gouda”).

Pictured above is a recent special that featured grits and fried green tomatoes. My hands-down favorite is the Kaijo: bacon, blue cheese, and fried onions. Haven’t finished one yet. The Husband, who has been known to stop in for lunch, is a fan of the straight-up Kuma: bacon, cheddar, and lord help him, a fried egg. Call the cardiologist: we went there a lot this winter.

Beet Greens

beetgreens

The other day I happened upon a gorgeous bunch of beets with perfectly intact, robust greens at the top. Sadly, this is a rare discovery. I made haste with the greens and we ate them that very night.

Beet greens pack a nutritional sucker-punch. High in potassium, vitamin K, vitamin A, and the anti-oxidents lutein and beta carotene, they’re really good for you in spite of their deliciousness and versatility.

My favorite way to enjoy all dark, leafy greens is after a quick saute with some aromatic additions as well as salt and freshly ground pepper. Saute the greens in olive oil with with garlic or minced shallot. finish with a squeeze of lemon juice, or a splash of soy sauce or sherry vinegar. Or gild the lily and cook a couple of strips of bacon, then add the greens. Definitely finish this with a lashing of sherry vinegar.

Tortoni

tortoni

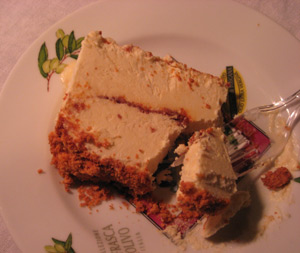
Brace yourselves, cookie lovers. Behold my latest obsession: tortoni, a humble yet complicated frozen dessert of Italian origin. I first read about it in the New York Times Magazine in February, in an article by my beloved Amanda Hesser. Haven’t read much by her in a while, and I keep forgetting to pick up her splendid cookbook/memoir/love story, Cooking for Mr Latte.

I first made this for an Academy Awards party and received the house party equivalent of a standing ovation. The almond cookie crumbs hold up to provide a crunchy counterbalance to the creamy, dreamy mousse. Let it warm up a little and it tastes even better. Because of its moussiness, it doesn’t truly melt…it just gets soft and velvety. Tis a pain in the ass, but completely worth it.

TORTONI
serves 8 gluttons or 12 polite friends

First, make yourself some Almond Paste:

1# 2 oz blanched almonds, lightly toasted, cooled completely
3/4 c confectioner’s sugar
pinch of salt
2 c sugar
1/2 c water
1/2 c light corn syrup
1/2 t almond extract

Grind almonds and 1 T confectioner’s sugar in food processor to a coarse powder. Add remaining confectioner’s sugar and salt and process to a fine powder. Dump into the bowl of a stand mixer.

Heat sugar, water, corn syrup in a saucepan over low heat, stir to combine. Once sugar has dissolved, increase heat and bring to a boil. Cook to 325F (between thread and soft ball).

Pour the syrup over the ground almond mixture and mix with the paddle attachment at low speed until combined. Cool to room temperature and mix in the almond extract. If the dough is too stiff or won’t bind, add a little boiling water.

Knead the dough until soft and elastic. Dust the counter with a little confectioner’s sugar if necessary. Wrap tightly in plastic wrap and refrigerate or freeze until ready to use.

Then, make the Macaroons:

[sidebar: these are more like Italian amaretti cookies than traditional American coconut macaroons or the heavenly French macaron]
2 egg whites
7 oz almond paste
3/4 c sugar
pinch salt
1/4 c confectioners’ sugar

1. Preheat oven to 325F. Place the egg whites in a large mixing bowl. Beat lightly with a fork.

2. In the bowl of a food processor, combine the almond paste, 3/4 cup of sugar and the salt. Pulse until combined. Scrape into the egg whites. Add the confectioners’ sugar and fold together. Let the batter sit for an hour or more.

3. Using two spoons, drop the batter onto parchment-lined well-insulated baking sheets at least 2 inches apart. (The drops should be about 2 teaspoonsful.) Bake until uniformly golden, about 18 minutes. Peel cookies from the parchment as soon as you can handle them without burning your fingers.

Finally, make the mousse that forms the business part of the tortoni:

12 macaroons
3/4 c sugar
3 eggs, separated
1 t vanilla
2 c heavy cream.

1.Preheat the oven to 250F. Break the macaroons into pieces and toast them on a baking sheet until golden, dry and crumbly. Let cool. Grind to fine crumbs in a food processor. You need about 1 cup. (Go ahead and toast/grind all the macaroons you’ve made. Store the extra crumbs in the freezer. You’ll want to make this again, trust me.)

2. Combine the sugar and 3/4 cup water in a small, heavy saucepan and bring to a boil. Cook until the syrup reaches 230 degrees on a candy thermometer.

3. Meanwhile, in a mixer, whip the egg whites until they form firm peaks. By hand, whip the yolks until fluffy. In the mixer bowl, fold together the whites and yolks.

4. When the sugar is ready, turn on the mixer to medium speed and, with it running, slowly pour in the syrup in a fine thread. Reduce the speed to low and whip until the mixture cools to room temperature. Mix in the vanilla.

5. Whip the cream and fold it into the egg mixture.

6. Line the base of a springform pan with parchment. Spoon a third of the crumbs into the base. Cover with half of the mousse. Sprinkle with another third of the crumbs. Cover with remaining mousse. Top with the remaining crumbs. Cover with plastic wrap and freeze overnight.

7. About 15 minutes before serving, remove from freezer. Unwrap and unmold immediately. Let it sit just a bit before cutting into wedges.
Cinco de Mango

mango

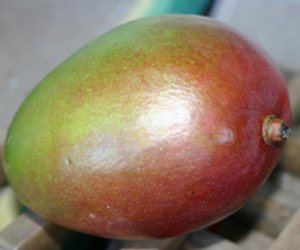
Here’s what the Husband and I will be having for dinner tonight: a slow-roasted pork shoulder smothered with mango salsa. This recipe comes from Ina Garten’s Barefoot Contessa Parties! cookbook. I love Ina Garten; her books are cheerful and she seems to truly have fun in the kitchen. Actually, this book played a peripheral role in my food epiphany, which occurred while I was skiing to a restaurant in Colorado. But that’s another story.

Ina pairs this cooked salsa with herb-y grilled shrimp skewers, which is a fantastic match. When rubbed over a pork shoulder or tenderloin and slow-roasted in the oven, the salsa cooks down to a sticky, intense and almost jam-like texture.  Also delicious on the side with brined, then grilled pork chops or chicken. Or grilled salmon. That’s right: in Chicago we’re on the brink of summer. So make some salsa and start your grills!

Mango Salsa

2 T. olive oil

1/3 c. scallions, diced OR 1 c. yellow onion, diced

2 t. garlic, minced

2 t. ginger, minced

2 ripe mangoes, chopped

1/3 c. orange juice, freshly squeezed if possible

2 t. brown sugar

2 t. jalapeño, minced

kosher salt, freshly ground pepper

2 t. fresh mint, minced

Sauté olive oil, onions, ginger in a large pan over medium-low heat until onions are translucent, about 10 minutes. Add the garlic and cook for another minute or so. Add the mangoes and reduce heat to low, cook for 10 minutes. Add the OJ, sugar, salt, pepper, and jalapeño and cook until the liquid is reduced, about 10 more minutes. Remove from heat and stir in the mint.

Makes 2 cups. Store in an airtight container in the fridge for up to 10 days. And while you can serve it chilled, it’s most delicious served warm or at room temperature.

Chocolate Tart

chocolatetart

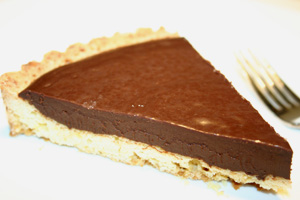
With rare exception, I don’t make fancy desserts. I’m not a decorator by any stretch and I always judge a dessert by its taste, not its presentation. But there are times when looks matter, and sometimes a homey cake is too, well, humble. Whenever I’m looking for an elegant dessert, I make this simple chocolate tart. The filling is chocolate ganache, which takes 15 minutes to make (this includes scrubbing out the food processor bowl). The crust is pâte sablée.

Together you have the winning combination of velvet and crunch. Not too sweet. Very rich. I don’t usually serve this with anything but coffee, but if you must, go for slightly sweetened whipped cream and a couple of raspberries. Small slivers will do, so a 9-inch tart can serve 12 with a bit left over for breakfast. Come on, you’ve done it, too.

Chocolate Tart

You will need a fully baked, cooled tart crust. I always use pâte sablée.

Chocolate ganache is simply equal parts of cream and chocolate melted together, with a knob of butter added at the end. The trick to perfectly smooth ganache is not to overdo the stirring, as you want the least amount of air incorporated into the mix. I’ve found the food processor does double-duty here, both chopping the chocolate and blending in the hot cream.

chocolate ganache in the food processor:

Drop 8 oz. bittersweet chocolate (the best quality you can afford) into the food processor and run until all pieces are finely chopped. Stop the machine. Pour in 1 c. heavy cream, boiling (I usually nuke it to the boiling point). Let sit for 1 minute. Process until satiny smooth. Add 2 oz. softened unsalted butter. Pulse until butter is incorporated.

Pour into tart crust, chill for 1 hour. Serve at room temperature!

Frangipane

When used as a filling for tarts, frangipane puffs up a little during baking and turns golden brown. This is also the happy discovery inside an almond croissant, for which I would walk over crushed glass if it meant I could have one right now. Here’s a recipe to fill a 9-inch tart. For the record, it’s pronounced “FRAN juh pain.” When you’re talking about the flowering shrub, you get to say “fran juh PAN ee.”

Frangipane

1 c. sliced almonds (blanched or not)

1/2 c. sugar

generous 3 oz. unsalted butter, at room temperature

pinch of salt

1/2 t. Brandy

1/8 t. almond extract

1 large egg

– Blend 1/8 c. sugar and the almonds in the food processor until the almonds are finely ground.

– Using a stand mixer with the paddle, beat the butter until smooth and creamy. Add the remaining sugar and beat. Add the almond mixture and beat. Add salt, Brandy, extract and beat. Add the egg and beat until fluffy.

– Stores for a week in the fridge, or freeze (you’ll need to re-beat it before using).

The crust for sweet tarts: pâte sablée

This isn’t the all-American flaky pie crust. Strictly translated, pâte sablée means “sandy paste.” When baked, pâte sablée gives you a crumbly, sandy, shortbread-cookie-like crust that works beautifully for tarts. Sweet and rich, it is the perfect foil to a dark chocolate ganache filling or a simple mix of berries.

Pâte Sablée

scant 5 oz. unsalted butter, cold

1/2 c. sugar

1 1/2 c. all-purpose flour

pinch of salt

1 egg yolk, beaten, at room temperature (separating the egg when it’s cold is easier)

– Cut the butter into small chunks and put it in the freezer for at least 10 minutes.

– In the food processor, combine sugar, flour, salt. Remove the lid and add the butter chunks. Pulse until the dough looks like streusel: big bits, little bits, not uniform. Pulse in the egg yolk. Just a few more pulses until the dough starts clumping together…and stop! Overworking will yield a tough crust. Turn the dough out onto a sheet of plastic wrap, gently gather in any stray floury bits, and wrap up, pressing the dough into a disc shape.

– Chill for up to 5 days. Well-wrapped, you can also store the dough in the freezer.

– When ready to bake, press the dough into a 9-inch tart pan with removable bottom. Be gentle. The trick is to shape the dough to the pan while maintaining the delicious crumbliness. Pop the pan and crust in the freezer for a good 20 minutes (or more) before baking.