Crackers…biscuits…what to eat with a cocktail

Years ago I read in one of Marcella Hazan’s cookbooks the value of having something easily on hand to serve to pop-in guests. This is a recipe I discovered on Epicurious, following is my modified version. Not so much a cracker as a savory biscuit, these are delicious: cheesy, spicy-tangy, crunchy, buttery. The dough is formed into logs and then chilled. Freeze a couple of logs and you’ll have a quick, fabulous treat to bake up in 15 minutes and make unexpected guests feel welcome. Also great as a light nibble with drinks before a heavy holiday dinner.

For all of you copy editors out there, Cheddar is capitalized because the cheese is named for the English village where it was first made in the 12th century.

Mustard Cheddar Crackers

1/2# unsalted butter, very soft

1# sharp grated Cheddar

2 scallions

1 egg yolk, at room temperature

1 T. Dijon mustard

2 T. dry mustard (I like Coleman’s)

1/4 c. mustard seeds, toasted and cooled

1 t. kosher salt, plus more for sprinkling

2 c. all-purpose flour

Blend butter, cheese, yolk, scallions, and Dijon in food processor until smooth. Add remaining ingredients and pulse until the dough has just come together (don’t overdo it or your dough will be tough). Scrape the dough into a bowl and chill for around 15 minutes, until firm enough to handle.
Form the dough into 2 logs, about 1 inch in diameter. I find that using plastic wrap to help shape the logs is the least messy way. Refrigerate at least 4 hours or you can freeze the logs and use as needed.

When ready to bake, remove logs from freezer. Preheat oven to 350F. Line 2 baking sheets with parchment or Silpats. Slice logs into thin slices. Sprinkle with a little kosher salt before baking. Crackers are finished when pale golden, 15 minutes at most. Store in an airtight container only when completely cooled.
Holiday goodies

Holiday bakers, start your ovens. Your friends are counting on at least a little bag of homemade love, of course they’re really hoping for a giant tin stuffed with your famous shortbread. In my world, nothing feels better than making something the people I love…will love.

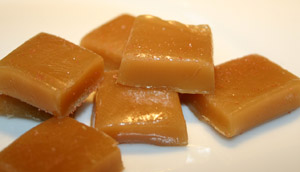
But what to make for the gluten-intolerant? The celiac-afflicted certainly get a raw deal all year round, but  it must be really tough at Christmas Cookie Time. My solution of late is candy. Specifically, salted caramels that taste like a grown-up childhood memory. Buttery, toasty, sweet, and a bit salty. Try one with a belt of your best Scotch and see if you don’t feel sorry for your 7-year-old self, making do with those Brach’s caramels from the A&P.

Candy-making scares people, but really it’s just a matter of precise temperature monitoring and showing proper respect to sugar’s ability to impart the worst burns of your life. Here’s a silly but informative site about sugar and candy. One piece of specialized equipment is crucial, however: you must have a candy thermometer to make candy. Spend the 10 bucks, store it in a place where the bulb won’t get crushed, and make these delicious caramels for your loved ones.

Salted Caramels

4 T. butter

1 1/2 c. heavy cream

2 c. sugar

1 t. sea salt

1/2 c. corn syrup

1 1/2 t. vanilla extract

+ more sea salt for sprinkling

Generously butter a 9-inch glass baking dish. In a deep, heavy saucepan, combine all ingredients except for the vanilla. Clip your candy thermometer to the side of the pan. Cook over medium heat and stir slowly with a wooden spoon. Cook to 245F to 248F (the firm-ball stage). No lower, no higher! Remove pan from heat and stir in vanilla. Pour into prepared pan and cool to room temperature. This is where your silicone oven-mitt comes in handy, too, as any stray caramel drips will wash off easily. When cooled, remove the whole slab from the pan (you may need to cut out a tiny corner piece to achieve this: cook’s bonus) and sprinkle with sea salt. Put the slab on waxed paper and refrigerate until firm enough to cut, about 15 minutes. Using a large, heavy chef’s knife, cut the caramels into 1-inch squares. If the slab is too hard to cut, let it sit out to soften. If it’s too soft, chill it a little longer. Wrap into pieces of waxed paper and store the wrapped candy in a ziplock bag in the fridge. Distribute to the truly worthy.

Farro

The Last Barbeque of Summer was this weekend, at our friends’ place in Oak Park. It’s a symbiotic relationship that developed a definite pattern this summer: We love abusing their hospitality by taking advantage of their grill, they love watching their kids take advantage/abuse us. Seems to work for all parties involved.

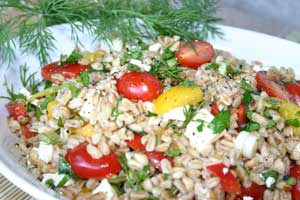
On the menu were burgers and beer. The realization that I’m but a month away from a bikini parade prompted my contribution of a salad. A while back I’d picked up a packet of farro, which has been loitering on the high shelf next to more popular items like crackers and chocolate. When it’s time to get serious about the whole grains, farro is a wonderful choice: minimally processed, it is high in proteins, carbohydrates, and vitamins and has a chewy, nutty taste. Also known as emmer wheat and grano farro, this grain was cultivated in ancient Egypt and was a staple for the Roman Empire.

Farro Summer Salad

– In a cast-iron skillet, toast the farro grains until lightly browned and fragrant. Keep the heat on and add liquid based on a 3:1 ratio. Chicken broth, vegetable broth, water and a little white wine, all work well. I used veggie stock from my freezer. Let the farro simmer until just past al dente.

– Meanwhile, chop fresh vegetables, herbs, and crumbly cheese. For this salad, I used tomatoes, peppers, dill, scallions, parsley, and feta. Make a vinaigrette of olive oil, white wine vinegar, lemon zest and juice, salt & pepper.

– Toss the farro, vegs, and vinaigrette. Add the cheese. That’s it! Toasted almond or pine nuts would have been a nice addition, if I’d thought of it at the time. Serve at room temperature or slightly chilled.

Reader, this took me all of 25 minutes, most of which was spent watching the grains cook. I used an 8 oz. packet, made about 12 servings. The leftovers made a great lunch on a bed of greens. This was a really delicious end-of-summer salad; think I’ll be making farro with roasted squash, caramelized onions, blue cheese, and a cumin/orange-based vinaigrette for fall and winter dinners.

Apple butter

For a guy who can go days without needing a baguette, the Husband loves the things one spreads on bread. Lemon curd. Almond butter. Toasted cheese. Apple butter. Early in our dating career, I made a batch of apple butter and presented him with a jar on his birthday. He was overjoyed, but that could have been because I served said butter with pancakes while wearing a nightie. Be honest, you’ve done it, too.

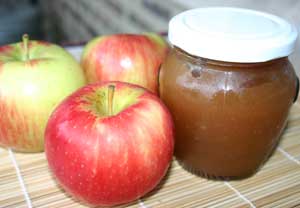
At the farmer’s market recently, I spied baskets of mixed apples: Golden Delicious, Cortland, Macintosh, Jonathan. I lugged one home in the spirit of “an apple a day…” Didn’t happen, and, fearing rot or mealiness, I made apple butter. The recipe comes from Joy of Cooking, the surprising ingredient is apple cider vinegar. Be sure to let it cook long enough: the apples’ naturally occurring pectin makes the end result wonderfully thick and spreadable, but you’ve got to cook out most of the moisture to get it.

Apple Butter

4 lbs. apples

1 c. water

1 c. apple cider vinegar

brown or white sugar

1/2 t. each of cinnamon, cloves, allspice

juice from half a lemon

pinch of salt

Wash, quarter, and remove stems and seeds from apples. Combine with liquids in a sauce pan and cook over low heat until very soft. Put fruit through a fine mesh strainer. Place in a saucepan. For each cup of fruit pulp, add 1/2 cup of sugar. Add remaining ingredients and cook over very low heat, stirring frequently. It’s done when a spoonful placed on a plate has no liquid seeping around the edges. Pour into hot sterilized jars. Store in the refrigerator.

Holy mole

Last week, an outing with friends to a concert caused me to change the menu for a big dinner I was doing Saturday night. After hearing a song about the making of mole poblano, a complex dried chile-based sauce from Mexico, I realized I’ve been wanting to make this ever since a Oaxacan cook gave me a recipe nearly 10 years ago.

Having long lost the recipe, which if I recall was more of a scrawl–in Spanish–on the back of an envelope, I found what appeared to be a solid one on Epicurious that included crucial suggestions and warnings that could mean the difference between tired cook/great sauce and scorched cook/ruined sauce.

Early Thursday morning, I rolled through the largest of my local Mexican grocers, searching for 3 kinds of dried chiles and countless seeds and spices. My amusement at the curiosity of the checkout guys (what’s this gringa buying?) turned to delight when I saw my total: $21.75. This was the high point of the day.

And then home, where the grind began. Each ingredient must be cooked separately, then combined in precise ways that all seemed to involve my Cuisinart bowl, which I must have washed a dozen times. The hours of labor, I soon learned, were a cake walk compared to the occupational hazards of making mole. I diligently heeded the warnings to wear gloves whilst de-seeding the ancho, mulato, and pasilla peppers and took care to avoid the sting of popping pumpkin seeds.

But I grossly underestimated the ferocity with which the chiles, now reconstitued and pureed, would spatter when heated in a stock pot. I also was off on the distance a bubble could fly. Within minutes, chile puree was spattered all over the stove, the kitchen cabinets, the floor, my arms. At the moment I realized that a thick, hot sauce made with spicy ingredients burns bare skin in two very distinct ways…a bubble popped and slapped me right in the eye. I recommend removing the contact lens as quickly as possible and then letting the tears flow freely.

It should be noted that the wise woman who first served me mole poblano had not made her own sauce, but purchased a paste from an expert mole maker at her local outdoor market. It should also be noted that like the French, I don’t attempt to make my own baguettes or croissants. Why I felt compelled to make a dish that requires a day of work, techniques I’ve never tried, and more than twenty ingredients, I cannot say. While on my hands and knees scrubbing the kitchen floor in front of my stove, I still didn’t know.

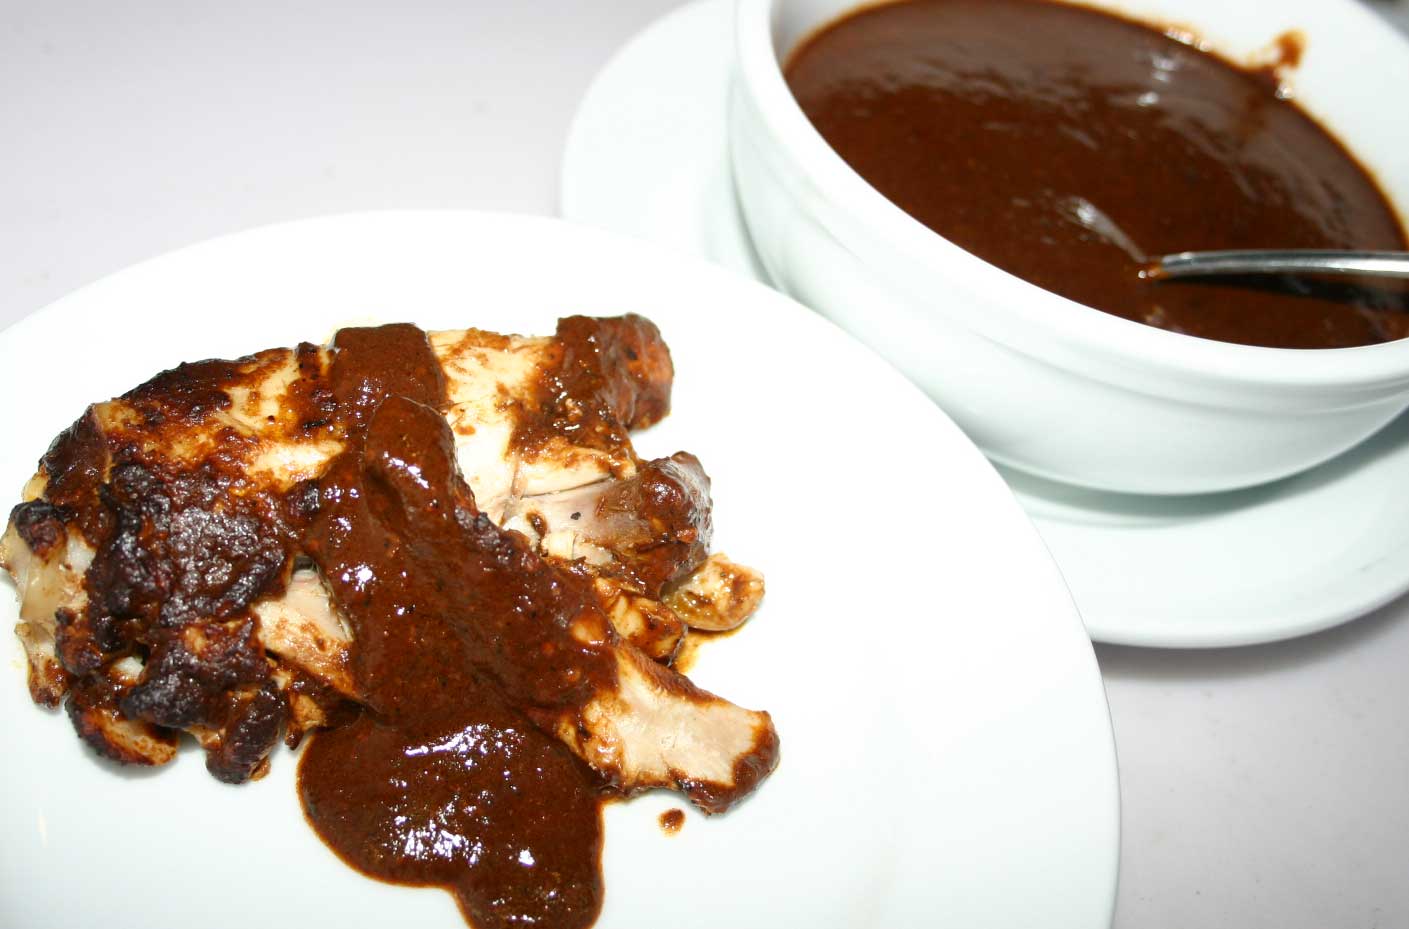
It wasn’t until the Husband and I had a sample with poached chicken for dinner that night that I realized: busting your ass to take a giant leap of faith feels amazing when the result is this good. The mole was simply fabulous. Dark, complex, earthy, spicy, sweet, smoky….luscious. Gorgeous on the plate, voluptuous the tongue. Thank goodness the 20+ people having dinner at my mother’s house were appreciative. But I’m no fool: it will be years before I try making this again. We’re hoarding a container of spare sauce in the freezer…maybe we’ll have mole for Christmas.

Pot roast

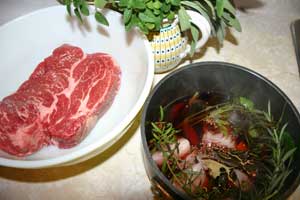
I knew we’d need something comforting to chew on while watching Sen. Obama and the Old Man “debate” their povs. As the weather was drizzly and chill, the only logical solution was pot roast. The genesis of this recipe comes from Craig Claiborne, late food editor of the NY Times. Note that you need to start it the night before to get the most from the mingled flavors of wine, herbs, and vegetables.

Pot Roast with Red Wine Sauce

*For the marinade:

4-6 lb. beef roast (I used chuck, because it was on sale at Whole Foods)

1/2 c. red wine vinegar

1 1/2 c. chopped onion

1 1/2 c. chopped carrot

1 c. chopped celery

4 garlic cloves, crushed

3 parsley sprigs

1 rosemary sprig

1 sage or thyme sprig (or both)

1 t. each mustard seeds and coriander seeds

sea salt & freshly ground pepper

4-5 c. dry red wine

Put the beef in a glass mixing bowl. Combine all other ingredients (except the wine) in a saucepan and bring to the boil. Pour over the beef. Sprinkle with salt and pepper, pour in enough wine to completely cover the beef. Seal tightly and refrigerate overnight.

*For the finished dish:

2 T. olive oil

3/4 c. chopped onion

3/4 c. chopped carrot

1/2 c. chopped celery

1/2 c. flour

2 c. beef broth

When ready to cook, remove beef from the marinade and pat dry. Strain the wine mixture, reserving at least 3 cups of liquid. Discard the veg and herbs. Turn the oven to 400F.

In a heavy Dutch oven with lid, heat oil and add the beef, browning on all sides. Transfer beef to a plate. Add onion, carrot, and celery to the pot, stirring and scraping up the browned bits. When onion has wilted, sprinkle in the flour and stir well. Pour in the marinade liquid and beef broth, stir until thickened. Add the beef, cover the pot, and put in the oven. Bake until the meat is very tender, 2-3 hours. If the sauce needs thickening, remove the beef and heat the sauce on the stovetop, stirring until it reaches desired consistency.

To go with, I roasted potatoes, turnips, and mushrooms in the oven with olive oil, garlic, and rosemary. Their browned crispiness was a nice counterbalance to the falling-apart beef and soft, sweet carrots. Absolutely delicious! Made the presidential debate go down a little easier. Or maybe that was the wine? The wine is why there’s no picture of the finished dish, sorry readers. Tom Brokaw can come for dinner any time he likes.

More soldier cookies

Once again, I felt compelled to join the effort of some 500 bakers and send cookies to a soldier in Iraq (at least that’s where I imagine he is stationed). This time the good Marines of the 10th Mountain Division will be receiving molasses cookies and oatmeal toffee cookies. If anyone’s interested in doing a good deed, check out the Baking GALS site.

Black-tie brownies

My standard brownie recipe comes from Dorie Greenspan’s cookbook, Baking: From My Home to Yours. Thin, fudgy and not too sweet, it provides the perfect hit of chocolatey goodness I tend to crave every afternoon.

So I was excited to see a variation on her blog that incorporates fresh raspberries. It’s absolutely delicious: the raspberries dry a bit in the baking and become more intense, which pairs perfectly with the bittersweet chocolate.

I usually cut her recipe in half and bake the batter in a tart pan with a removable bottom (place the pan on a cookie sheet to protect your oven). Cut into slim wedges and served with a tiny scoop of vanilla ice cream, it’s an elegant dinner party dessert. Go ahead: use the pretty dessert plates. Makes 8-12 servings, depending on how much your guests ate for dinner.

Dorie Greenspan’s Bittersweet Brownies with Raspberries

1 stick unsalted butter

5 oz. bittersweet chocolate, coarsely chopped

3/4 c. sugar

2 eggs

1/2 t. pure vanilla extract

pinch of salt

1/2 c. flour

1 pint raspberries

Preheat oven to 325F. Butter and flour a tart pan or make it easier on yourself and use Baker’s Joy. Place the tart pan on a cookie sheet.

Put the butter and chocolate into a large heatproof bowl and place over a saucepan of simmering water. Stir occasionally until melted. Remove bowl from heat. Whisk in the sugar. Add the eggs one at a time, then vanilla. Stir until you have a smooth batter. Add flour and salt and mix just until the dry ingredients are incorporated. Scrape the batter into the pan, and smooth the top, scatter the raspberries over the batter.

Bake the brownies until the top is dull and a knife inserted into the center comes out clean, 30-40 minutes. Transfer the pan to a rack and cool the brownies to room temperature. When ready to serve, remove the tart pan sides and cut into wedges with a large knife.

You say pancake, I say corn cake

I have a love/hate with pancakes, Johnny cakes, flapjacks, griddle cakes, call them what you will. Love: sweet for breakfast, maple syrup paired with bacon, crisp dry brown edges. Hate: too-sweet for breakfast, flabby middles, the ill feeling that comes after eating just one. I’m always tempted to order them when the Husband and I go out for breakfast, but have been let down too many times to fall for their maple-drenched sweet song. So I make them at home, but rarely. Pancakes are a pain in that unless one has a giant griddle, only one serving can be delivered at a time. Which means the Husband is eating a plate of hot cakes and reading the Sunday paper while I’m standing at the stove. This paints a picture of Rockwellian domesticity I never, ever thought could be my life. So I really have to want them to make the damn things. Which I did last Sunday morning.

This recipe comes from the venerable Joy of Cooking, specifically the 1975 Rombauer/Becker edition (55th printing). I look something up in this book at least once a day, and it shows: falling apart, pages stuck together, spattered, homely. But it knows it’s the queen of the kitchen bookcase, and I know it makes the reviled 1997 version feel like the unloved bastard stepchild it is, languishing unopened on the bottom shelf.

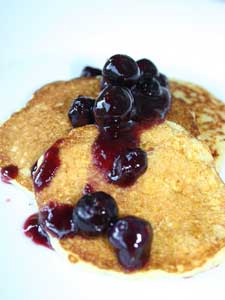
I added a cup of fresh sweet corn, cut from the cob, to the batter. The sauce consists of maple syrup and frozen summer blueberries, warmed up in a pot. Bacon on the side is a must (there was none left at picture time). Once you get your pan to the right temperature, you are guaranteed a crispy, corny, delicious cake.

Crisp Corn Flapjacks

Mix together in a bowl:

1-1/3 c. cornmeal (not too coarsely ground!)

1/4 c. flour

1-1/4 t. salt

1/2 t. baking soda

Cut in with a pastry blender or fork:

1/4 c. unsalted butter

In a big measuring cup, combine:

2 c. buttermilk

2 eggs

1 c. fresh corn from the cob

Blend the liquid ingredients into the dry using a few swift strokes until just combined. Spoon onto a hot buttered cast iron skillet..I prefer smaller cakes because they’re easier to flip. You may need to rebeat the batter a couple of times.

Looks like this is the end…

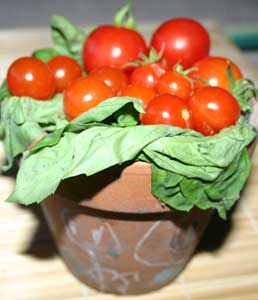
…but stay tuned for next summer. Sigh. No more home-grown tomatoes. I was watching a friends’ place while they were out of town, collecting mail and watering the garden. And picking the last of their cherry tomatoes. Sweet basil, too. The flower pot (an excellent conveyance for small produce) was decorated by their kid.